Ok so I drew out the plans then took pics of them, so you all can see what I worked from.
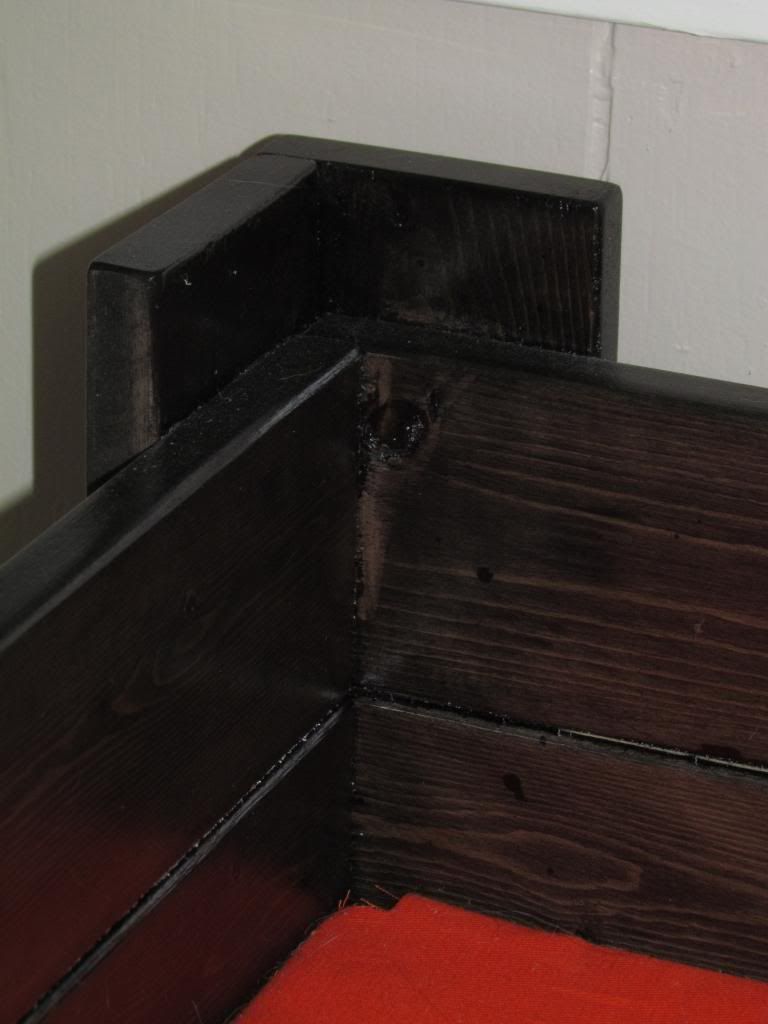
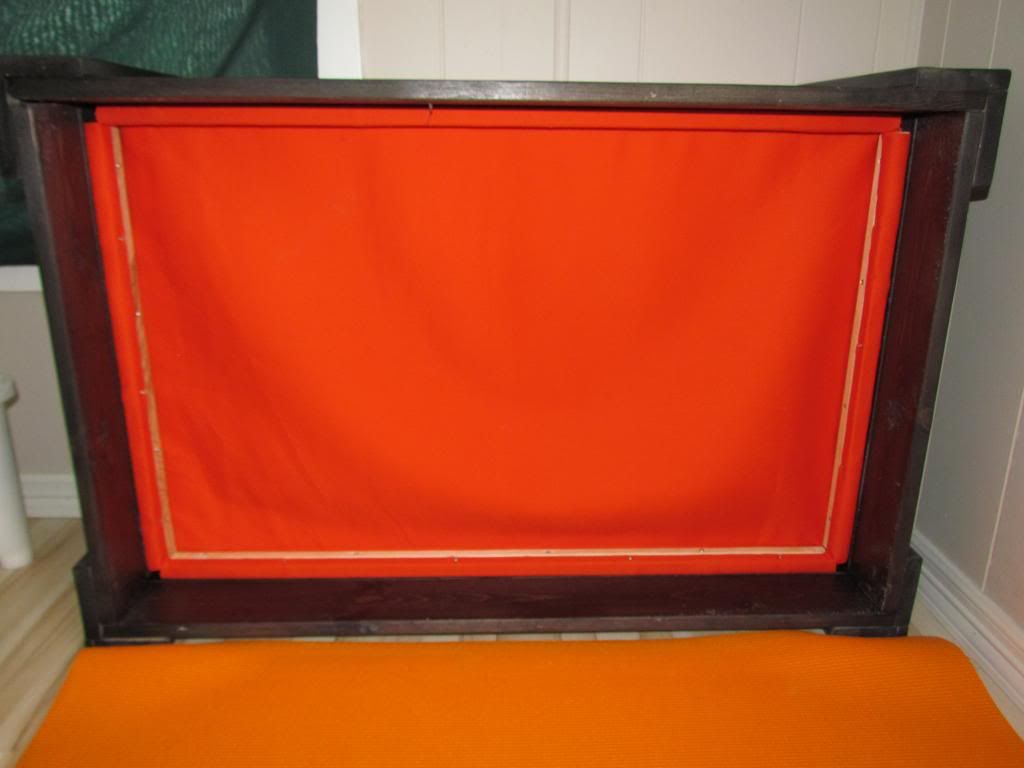
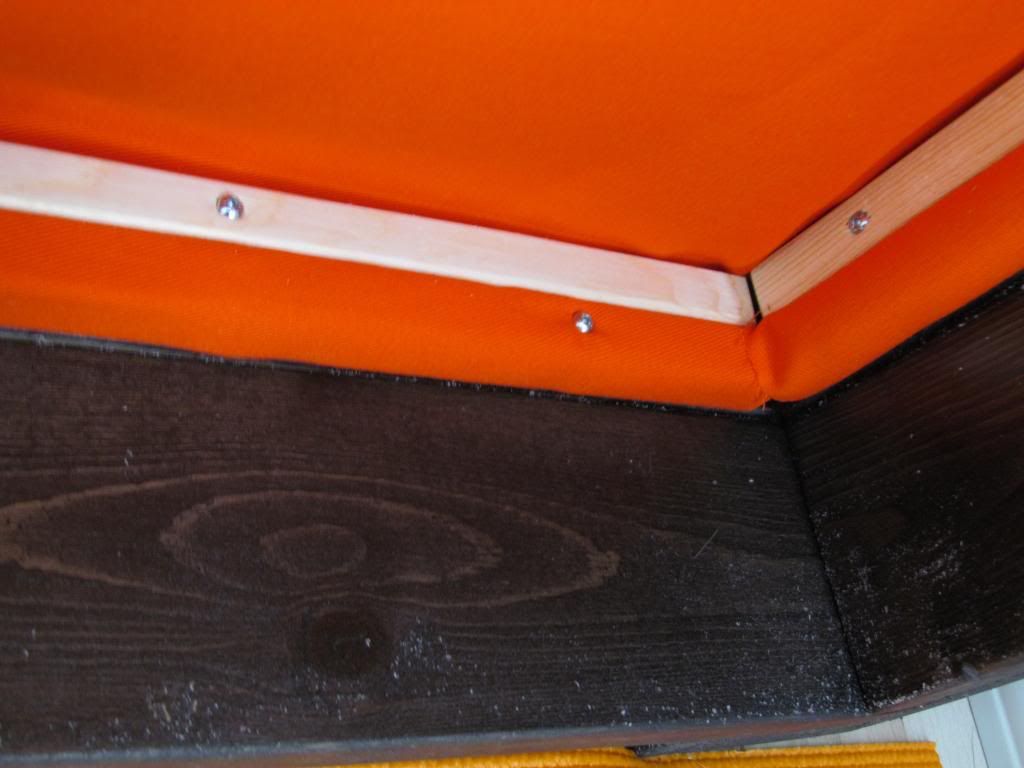
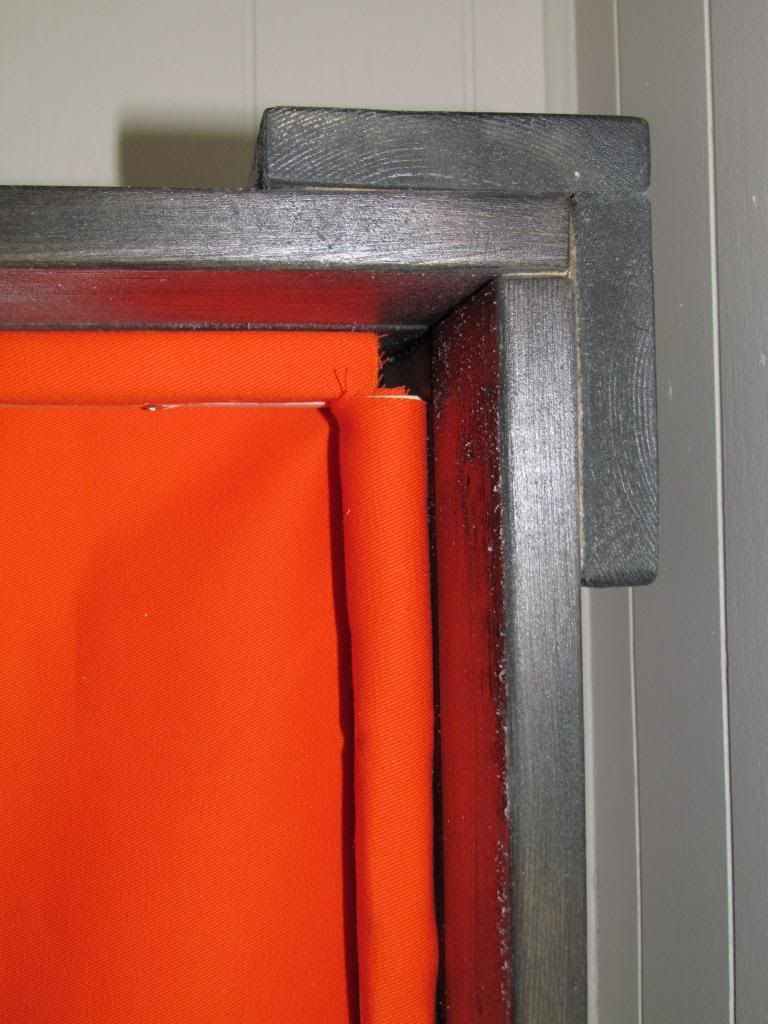
The fabric is the hardest to draw out, and hard to explain, but I'll try. I used 1x1's glued and screwed the end of the fabric between them, then rolled it around then over the top (hope you can see how from the close-up pic), and screwed it to the sides.
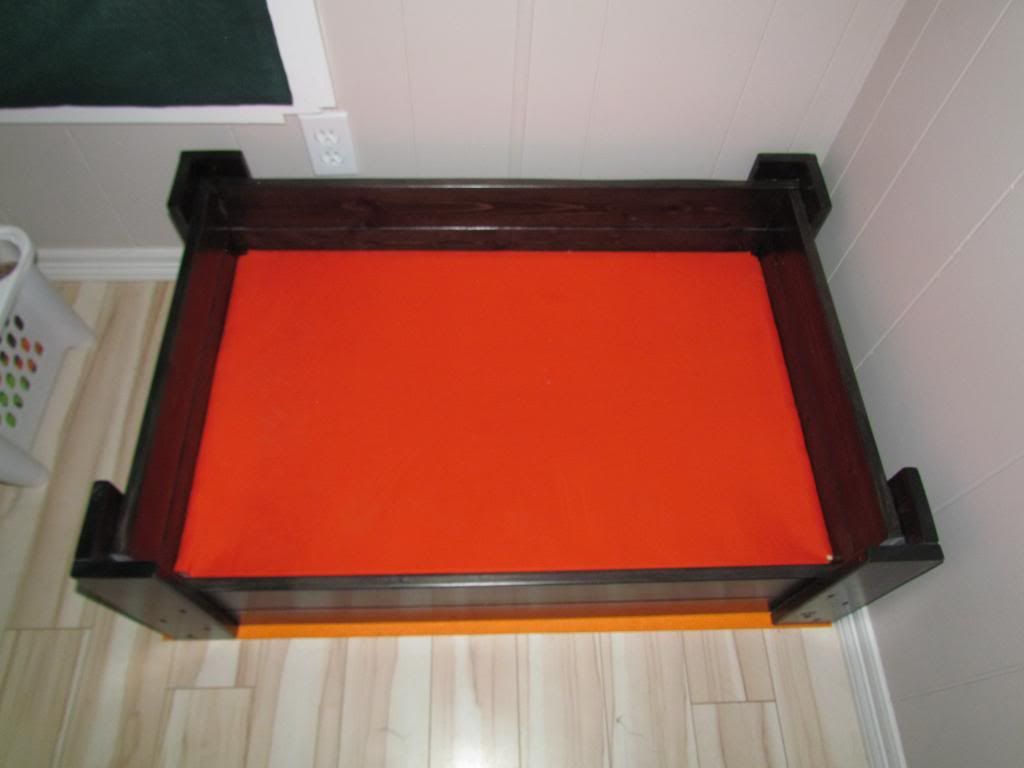
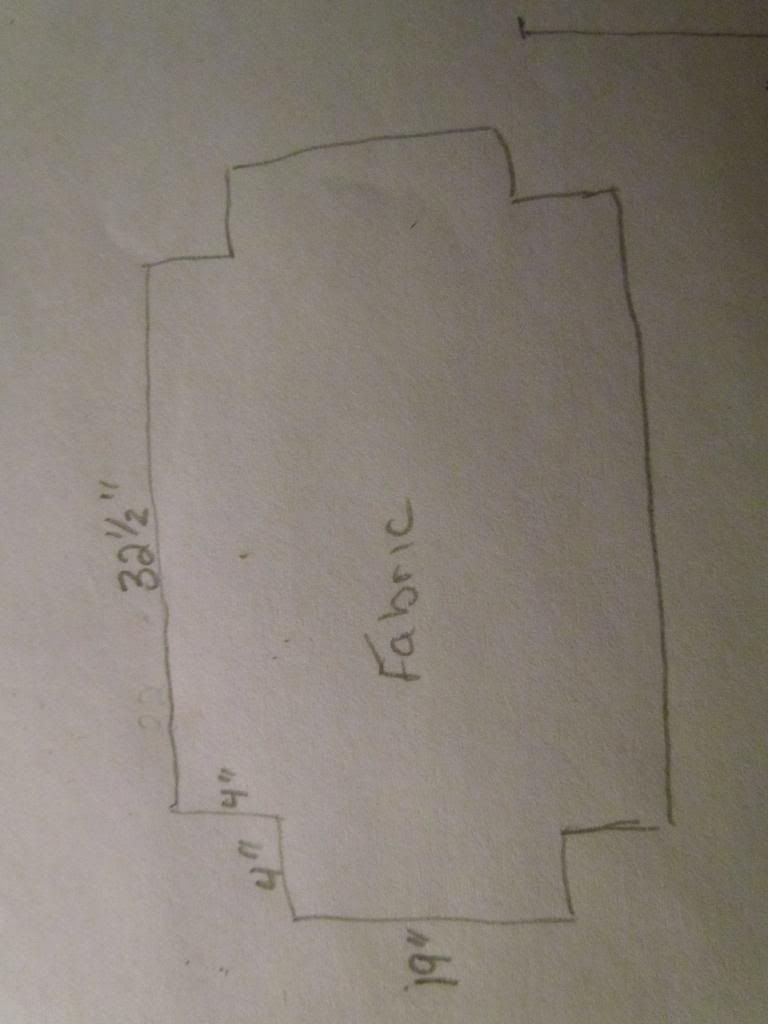
I did not glue the 1x1's to the side, as I'll likely, at some point, need to replace the fabric. The bottom of the 1x1 is even with the bottom of the second 1x4. Here's the pic of the fabric measurements and shape:
I glued wherever there are screws for added strength, but you all may want to consider corner braces underneath the edges of the 1x1's for added strength, if building for a large dog.
Also, I was in a hurry, so did not pre-drill before screwing... but if you want a nicer finished product, you should pre-drill before screwing it together. I did, however, pre-drill the 1x1's as they would have been destroyed without it.
You can also sink the screws a bit, then putty them to give a smooth finish.
I screwed from the outside, as, even though that's what we see, I wanted the inside to be perfectly smooth for the dogs.
Screws need to be 1 1/4" wood screws, 1 1/2 can be used when screwing the corners in, but not necessary.
Material needs to be very tough, and non stretchy... outdoor material works best. I bought a length that was 60" wide and 1 meter long and doubled it up for added strength.
I used plain old spruce lumber, but you could use something fancier, however, be aware that when you get into the fancier wood, 1x4 might actually mean 1x4 not 3/4x3 1/2 like regular lumber is, so change plans accordingly.
Total cost to me was $15 for the screws and lumber and $12 for the fabric. I didn't have to buy the stain or lacquer... I used the stuff at work.
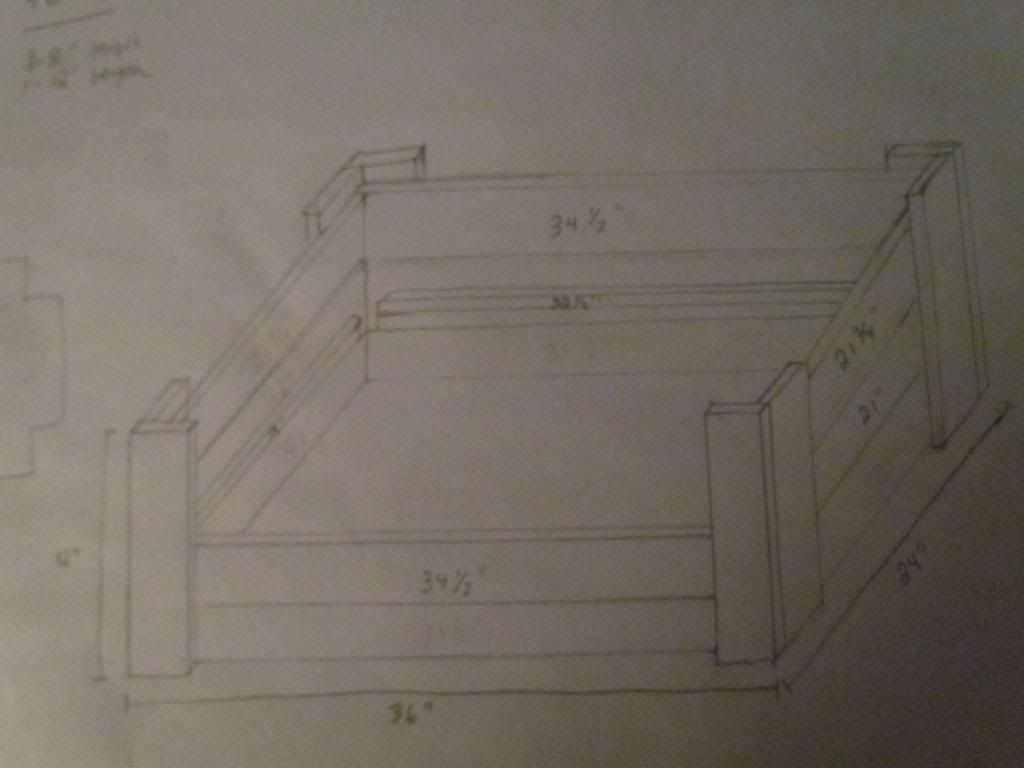
Here's a pic of the plans:
Here's the measurements for the 1x4's
5@ 34 1/2"
2@21 3/4"
4@21"
8@12"
for the 1x1's
4@32 1/2"
4@19"
you will need 3 - 12 foot lengths of 1x4's, 1 - 8 foot 1x1, and 1 - 12 foot 1x1 ok so I think that's all
")

 This is going to be my project for the march break! Can't wait!

") Kodi just got a new orthopedic bed for Christmas but I just might have to make this for him anyway. Then again, Kodi prefers sprawling out on the floor or in his crate (he drags out every blanket or bed I put in there and insists on sleeping on the hard crate flooring
Kodi just got a new orthopedic bed for Christmas but I just might have to make this for him anyway. Then again, Kodi prefers sprawling out on the floor or in his crate (he drags out every blanket or bed I put in there and insists on sleeping on the hard crate flooring  ). But it's so cute, I probably will anyway!